Step 1: Building a Docker Image
Table of Contents
Objective: Build a Docker image from an existing project.
There are many projects in GitHub that you can host yourself! A user
has created a list called awesome-selfhosted. Some of the projects
have a Docker image, but others don’t. We built a Docker image to
host our help desk site. This site runs Sphinx in Docker using
a customer Dockerfile built from
the nginx:alpine image.
Let’s start with an existing project that includes a Dockerfile called pandoc-as-a-service. Pandoc is a library that converts files many types of files. We have our version running on site pandoc.bilimedtech.com.
4.1.1 Cloning a project
First, we will clone the pandoc-as-a-service project.
Cloning a GitHub project using Ubuntu 18.04 is easy! You use the command
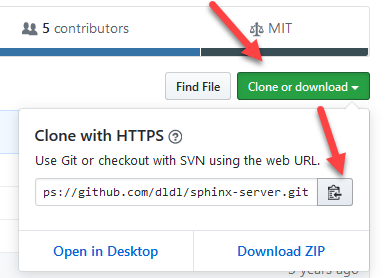
git clonewith the site to clone as the argument.Go to the pandoc-as-a-service project page
Copy the project clone URL
Clone the project using
git clone <project-url.git>Change to the root directory using
cd ~or change to the directory of your choice before cloning the project.
git clonewill create a folder calledpandoc-as-a-service.
cd ~
git clone https://github.com/mrded/pandoc-as-a-service.git
cd pandoc-as-a-service
Output1root@vps298933:~# cd ~ 2root@vps298933:~# git clone https://github.com/mrded/pandoc-as-a-service.git 3Cloning into 'pandoc-as-a-service'... 4remote: Enumerating objects: 171, done. 5remote: Total 171 (delta 0), reused 0 (delta 0), pack-reused 171 6Receiving objects: 100% (171/171), 32.36 KiB | 571.00 KiB/s, done. 7Resolving deltas: 100% (77/77), done. 8root@vps298933:~# 9root@vps298933:~# cd pandoc-as-a-service/ 10root@vps298933:~/pandoc-as-a-service# ls -lh 11total 60K 12-rw-r--r-- 1 root root 486 Nov 13 11:27 Dockerfile 13-rw-r--r-- 1 root root 18K Nov 13 11:27 LICENSE 14-rw-r--r-- 1 root root 17 Nov 13 11:27 Procfile 15-rw-r--r-- 1 root root 538 Nov 13 11:27 README.md 16-rw-r--r-- 1 root root 212 Nov 13 11:27 helpers.js 17-rw-r--r-- 1 root root 75 Nov 13 11:27 index.js 18-rw-r--r-- 1 root root 872 Nov 13 11:27 package.json 19drwxr-xr-x 3 root root 4.0K Nov 13 11:27 public 20-rw-r--r-- 1 root root 887 Nov 13 11:27 server.js 21drwxr-xr-x 2 root root 4.0K Nov 13 11:27 tests 22drwxr-xr-x 2 root root 4.0K Nov 13 11:27 views 23root@vps298933:~/pandoc-as-a-service#
4.1.2 The Docker Build Process
Tip
The overview of the Dockerfile Elements is in lab 5 and in the references section.
The Dockerfile contains the specific instructions to build the image. You
can view the pandoc-as-a-service Dockerfile on their GitHub page.
The file is in our project directory because we cloned the
project. You can view the contents using on the local VPS using
nano Dockerfile.
The Docker build process will execute each command as if the user types them into the bash terminal.
 1 FROM node:6.10
 2
 3 # Create app directory
 4 COPY . /usr/src/pandoc-as-a-service
 5 WORKDIR /usr/src/pandoc-as-a-service
 6
 7 # Install packages
 8 RUN apt-get update --fix-missing \
 9   && apt-get install -y pandoc \
10   && apt-get clean \
11   && rm -rf /var/lib/apt/lists/* \
12   && npm install
13
14 EXPOSE 8080
15
16 CMD ["npm", "start"]
Note
This project is several years old and it might not build without modifications.
First, we build the image without modifications to verify that the build process succeeds.
We’ll use
docker buildto execute the build. Here is a look at the command and the arguments:docker build -t pandoc:default .
docker buildThe build command
-t pandoc:defaultSpecifies an image name.
pandoc:defaultis a name:tag pair.namedefines the name of the project.tagdefines a specific build, such as a product or test version.We will call ours
defaultbecause it is the default image without any modifications.
.Instructs the build process to look in the current directory for the Dockerfile
Note
You might get the error
free(): invalid pointer. If so, just ignore it.You will notice that there is a step for each command in the Dockerfile.
Output1root@vps298933:~# cd ~/pandoc-as-a-service/ 2root@vps298933:~/pandoc-as-a-service# docker build -t pandoc:default . 3Sending build context to Docker daemon 148kB 4Step 1/9 : FROM node:6.10 56.10: Pulling from library/node 610a267c67f42: Pull complete 7fb5937da9414: Pull complete 89021b2326a1e: Pull complete 9dbed9b09434e: Pull complete 1074bb2fc384c6: Pull complete 119b0a326fab3b: Pull complete 128089dfd0519a: Pull complete 13f2be1898eb92: Pull complete 14Digest: sha256:39c92a576b42e5bee1b46bd283c7b260f8c364d8826ee07738f77ba74cc5d355 15Status: Downloaded newer image for node:6.10 16 ---> 3f3928767182 17Step 2/9 : COPY . /usr/src/pandoc-as-a-service 18 ---> 23dad85d5658 19Step 3/9 : WORKDIR /usr/src/pandoc-as-a-service 20 ---> Running in 4f5cc68ad59f 21Removing intermediate container 4f5cc68ad59f 22 ---> 47e79eda57ab 23Step 4/9 : RUN apt-get update --fix-missing && apt-get install -y pandoc && apt-get clean && rm -rf /var/lib/apt/lists/* && npm install 24 ---> Running in 7b54baf06e47 25Get:1 http://security.debian.org jessie/updates InRelease [44.9 kB] 26Ign http://deb.debian.org jessie InRelease 27Get:2 http://deb.debian.org jessie-updates InRelease [16.3 kB] 28Get:3 http://deb.debian.org jessie Release.gpg [1652 B] 29Get:4 http://deb.debian.org jessie Release [77.3 kB] 30Get:5 http://security.debian.org jessie/updates/main amd64 Packages [992 kB] 31Get:6 http://deb.debian.org jessie-updates/main amd64 Packages [20 B] 32Get:7 http://deb.debian.org jessie/main amd64 Packages [9098 kB] 33Fetched 10.2 MB in 5s (1847 kB/s) 34Reading package lists... 35W: There is no public key available for the following key IDs: 36AA8E81B4331F7F50 37Reading package lists... 38Building dependency tree... 39Reading state information... 40The following extra packages will be installed: 41 liblua5.1-0 pandoc-data 42Suggested packages: 43 texlive-latex-recommended texlive-xetex texlive-luatex pandoc-citeproc 44 etoolbox 45The following NEW packages will be installed: 46 liblua5.1-0 pandoc pandoc-data 470 upgraded, 3 newly installed, 0 to remove and 183 not upgraded. 48Need to get 4764 kB of archives. 49After this operation, 38.9 MB of additional disk space will be used. 50Get:1 http://deb.debian.org/debian/ jessie/main liblua5.1-0 amd64 5.1.5-7.1 [108 kB] 51Get:2 http://deb.debian.org/debian/ jessie/main pandoc-data all 1.12.4.2~dfsg-1 [202 kB] 52Get:3 http://deb.debian.org/debian/ jessie/main pandoc amd64 1.12.4.2~dfsg-1+b14 [4453 kB] 53debconf: delaying package configuration, since apt-utils is not installed 54Fetched 4764 kB in 0s (26.8 MB/s) 55Selecting previously unselected package liblua5.1-0:amd64. 56(Reading database ... 21217 files and directories currently installed.) 57Preparing to unpack .../liblua5.1-0_5.1.5-7.1_amd64.deb ... 58Unpacking liblua5.1-0:amd64 (5.1.5-7.1) ... 59Selecting previously unselected package pandoc-data. 60Preparing to unpack .../pandoc-data_1.12.4.2~dfsg-1_all.deb ... 61Unpacking pandoc-data (1.12.4.2~dfsg-1) ... 62Selecting previously unselected package pandoc. 63Preparing to unpack .../pandoc_1.12.4.2~dfsg-1+b14_amd64.deb ... 64Unpacking pandoc (1.12.4.2~dfsg-1+b14) ... 65Setting up liblua5.1-0:amd64 (5.1.5-7.1) ... 66Setting up pandoc-data (1.12.4.2~dfsg-1) ... 67Setting up pandoc (1.12.4.2~dfsg-1+b14) ... 68Processing triggers for libc-bin (2.19-18+deb8u9) ... 69npm info it worked if it ends with ok 70npm info using npm@3.10.10 71npm info using node@v6.10.3 72. . . 73npm info lifecycle http-signature@1.2.0~postinstall: http-signature@1.2.0 74npm info lifecycle ejs@2.7.4~postinstall: ejs@2.7.4 75 76> ejs@2.7.4 postinstall /usr/src/pandoc-as-a-service/node_modules/ejs 77> node ./postinstall.js 78 79Thank you for installing EJS: built with the Jake JavaScript build tool (https://jakejs.com/) 80 81npm info lifecycle express@4.17.1~postinstall: express@4.17.1 82npm info lifecycle mocha@2.5.3~postinstall: mocha@2.5.3 83npm info lifecycle pdc@0.2.3~postinstall: pdc@0.2.3 84npm info lifecycle request@2.88.2~postinstall: request@2.88.2 85npm info linkStuff pandoc-as-a-service@1.0.0 86npm info lifecycle pandoc-as-a-service@1.0.0~install: pandoc-as-a-service@1.0.0 87npm info lifecycle pandoc-as-a-service@1.0.0~postinstall: pandoc-as-a-service@1.0.0 88npm info lifecycle pandoc-as-a-service@1.0.0~prepublish: pandoc-as-a-service@1.0.0 89pandoc-as-a-service@1.0.0 /usr/src/pandoc-as-a-service 90+-- ejs@2.7.4 91+-- express@4.17.1 92| +-- accepts@1.3.7 93| | -- negotiator@0.6.2 94. . . 95| -- to-iso-string@0.0.2 96+-- pdc@0.2.3 97npm info ok 98Removing intermediate container 7b54baf06e47 99 ---> c9695d3f8147 100Step 5/9 : EXPOSE 8080 101 ---> Running in 3c9812aad9f4 102Removing intermediate container 3c9812aad9f4 103 ---> b18246a14903 104Step 6/9 : CMD ["npm", "start"] 105 ---> Running in 207441ad6c54 106Removing intermediate container 207441ad6c54 107 ---> 83ecfb330e4c 108Successfully built bfb93547ba62 109Successfully tagged pandoc:default 110root@vps298933:~/pandoc-as-a-service#
We should verify that the image build successfully.
Use command
docker imagesto view the list of images on the VPSYou should see an image called
pandoc-with tagdefaultThe
pandocimage was built from a base image callednode:6.10in step 1. Notice that this is version is three years old! We need to rebuild using an updated version that contains security updates.Outputroot@vps298933:~/pandoc-as-a-service# docker images REPOSITORY TAG IMAGE ID CREATED SIZE pandoc default bfb93547ba62 10 minutes ago 720MB mariadb latest 2ab9d091310d 32 hours ago 414MB nextcloud latest 3ed6ea445002 7 days ago 811MB wordpress latest 6edecd0f5c75 7 days ago 546MB redis latest 62f1d3402b78 2 weeks ago 104MB mysql 5.7 1b12f2e9257b 3 weeks ago 448MB hello-world latest bf756fb1ae65 10 months ago 13.3kB node 6.10 3f3928767182 3 years ago 661MB root@vps298933:~/pandoc-as-a-service#
4.1.3 Create the docker-compose file
The docker-compose.yml file is simple. We will use port 20852
for our Pandoc service. The pandoc service in the docker container
listens on port 8080. We need to create the correct port map in
the docker-complete.yml file.
Create a new directory for your project
cd ~
mkdir pandoc-docker
cd pandoc-docker
Create a
docker-compose.ymlfile and add this text:docker-compose.yml1version: "3.3" 2 3services: 4 pandoc: 5 image: pandoc:default 6 ports: 7 - 20852:8080 8 restart: always
Start the service and verify connectivity
docker-compose up -d
curl --head http://localhost:20852
curl http://localhost:20852
4.1.4 Create a Reverse Proxy for Pandoc
Lastly, we need to create a reverse proxy. Here is my site, for example: pandoc.y.jj8i.com.
Create sub-domain pandoc.example.com
Create your Reverse Proxy using these settings
server_name pandoc.example.com;proxy_pass http://localhost:20852;
Enable the Nginx Site
Restart Nginx