Step 6: Install Nginx
Table of Contents
Nginx
We’ll use Nginx to serve local files and as a reverse proxy for Docker. See the guide on Digital Ocean on how to install Nginx for more details. We will talk more about how to use a reverse proxy in a later lab.
Update the repository and then install Nginx
sudo apt update
sudo apt install -y nginx
 1root@vps298933:~# sudo apt install nginx
 2Reading package lists... Done
 3Building dependency tree
 4Reading state information... Done
 5The following additional packages will be installed:
 6fontconfig-config fonts-dejavu-core libfontconfig1 libgd3 libjbig0 libjpeg-turbo8 libjpeg8 libnginx-mod-http-geoip libnginx-mod-http-image-filter
 7libnginx-mod-http-xslt-filter libnginx-mod-mail libnginx-mod-stream libtiff5 libwebp6 libxpm4 nginx-common nginx-core
 8Suggested packages:
 9libgd-tools fcgiwrap nginx-doc ssl-cert
10The following NEW packages will be installed:
11fontconfig-config fonts-dejavu-core libfontconfig1 libgd3 libjbig0 libjpeg-turbo8 libjpeg8 libnginx-mod-http-geoip libnginx-mod-http-image-filter
12libnginx-mod-http-xslt-filter libnginx-mod-mail libnginx-mod-stream libtiff5 libwebp6 libxpm4 nginx nginx-common nginx-core
130 upgraded, 18 newly installed, 0 to remove and 0 not upgraded.
14Need to get 2,460 kB of archives.
15After this operation, 8,194 kB of additional disk space will be used.
16Do you want to continue? [Y/n] y
17.
18.
19.
Verify that Nginx is running.
Running correctly: You should see a line that says:
Active: active (running)Problem: An inactive command means that it did not start:
Active: inactive (dead)
sudo systemctl status nginx
 1 root@vps298933:~# sudo systemctl status nginx
 2 ● nginx.service - A high performance web server and a reverse proxy server
 3 Loaded: loaded (/lib/systemd/system/nginx.service; enabled; vendor preset: enabled)
 4     **Active: active (running)** since Sun 2019-01-20 15:06:30 +06; 34s ago
 5     Docs: man:nginx(8)
 6 Process: 12544 ExecStart=/usr/sbin/nginx -g daemon on; master_process on; (code=exited, status=0/SUCCESS)
 7 Process: 12531 ExecStartPre=/usr/sbin/nginx -t -q -g daemon on; master_process on; (code=exited, status=0/SUCCESS)
 8 Main PID: 12548 (nginx)
 9     Tasks: 2 (limit: 4588)
10 CGroup: /system.slice/nginx.service
11         +-12548 nginx: master process /usr/sbin/nginx -g daemon on; master_process on;
12         +-12550 nginx: worker process
13
14 Jan 20 15:06:30 vps298933 systemd[1]: Starting A high performance web server and a reverse proxy server...
15 Jan 20 15:06:30 vps298933 systemd[1]: nginx.service: Failed to parse PID from file /run/nginx.pid: Invalid argument
16 Jan 20 15:06:30 vps298933 systemd[1]: Started A high performance web server and a reverse proxy server.
17 root@vps298933:~#
Now, we need to get our server IP address if we don’t know it. We can look at the terminal configuration settings or use ifconfig.
Use
ifconfigto find the address (look for the real address, not a private address)Private addresses use these address ranges:
192.168.0.0 - 192.168.255.255
172.16.0.0 - 172.31.255.255
10.0.0.0 - 10.255.255.255
Here is an example that shows the real address in interface
ens3
ifconfig
 1 root@vps298933:~# ifconfig
 2 docker0: flags=4099<UP,BROADCAST,MULTICAST>  mtu 1500
 3         inet 172.17.0.1  netmask 255.255.0.0  broadcast 172.17.255.255
 4         inet6 fe80::42:5cff:fec9:f7b6  prefixlen 64  scopeid 0x20<link>
 5         ether 02:42:5c:c9:f7:b6  txqueuelen 0  (Ethernet)
 6         RX packets 0  bytes 0 (0.0 B)
 7         RX errors 0  dropped 0  overruns 0  frame 0
 8         TX packets 3  bytes 266 (266.0 B)
 9         TX errors 0  dropped 0 overruns 0  carrier 0  collisions 0
10
11 ens3: flags=4163<UP,BROADCAST,RUNNING,MULTICAST>  mtu 1500
12         inet 46.105.29.128  netmask 255.255.255.255  broadcast 0.0.0.0
13         inet6 fe80::f816:3eff:fe66:6755  prefixlen 64  scopeid 0x20<link>
14         ether fa:16:3e:66:67:55  txqueuelen 1000  (Ethernet)
15         RX packets 111212  bytes 51808541 (51.8 MB)
16         RX errors 0  dropped 0  overruns 0  frame 0
17         TX packets 137277  bytes 13619148 (13.6 MB)
18         TX errors 0  dropped 0 overruns 0  carrier 0  collisions 0
19
20 lo: flags=73<UP,LOOPBACK,RUNNING>  mtu 65536
21         inet 127.0.0.1  netmask 255.0.0.0
22         inet6 ::1  prefixlen 128  scopeid 0x10<host>
23         loop  txqueuelen 1000  (Local Loopback)
24         RX packets 219  bytes 21354 (21.3 KB)
25         RX errors 0  dropped 0  overruns 0  frame 0
26         TX packets 219  bytes 21354 (21.3 KB)
27         TX errors 0  dropped 0 overruns 0  carrier 0  collisions 0
Verify that Nginx will serve a web page to determine if it is working. You should see similar output.
curlis a command-line tool and library for transferring data with URL syntax, supporting HTTP, HTTPS, FTP, FTPS, GOPHER, TFTP, SCP, SFTP, SMB, TELNET, DICT, LDAPS, FILE, IMAP, SMTP, POP3, RTSP and RTMP.We will use
curlto test our application.
curl your-ip-address
 1 root@vps298933:~# curl 192.168.1.8
 2 <!DOCTYPE html>
 3 <html>
 4 <head>
 5 <title>Welcome to nginx!</title>
 6 <style>
 7     body {
 8         width: 35em;
 9         margin: 0 auto;
10         font-family: Tahoma, Verdana, Arial, sans-serif;
11     }
12 </style>
13 </head>
14 <body>
15 <h1>Welcome to nginx!</h1>
16 <p>If you see this page, the nginx web server is successfully installed and
17 working. Further configuration is required.</p>
18
19 <p>For online documentation and support please refer to
20 <a href="http://nginx.org/">nginx.org</a>.<br/>
21 Commercial support is available at
22 <a href="http://nginx.com/">nginx.com</a>.</p>
23
24 <p><em>Thank you for using nginx.</em></p>
25 </body>
26 </html>
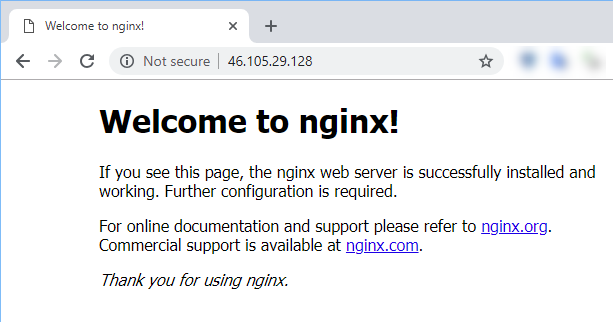
Now, access the webpage from your browser. You should see the default Nginx page. Here is the expected result.