Step 1: Interacting with your VPS
Table of Contents
Interacting with Your VPS
Most Linux VPSs use the command line only. There are practical reasons for this, such as using less memory and automating the commands. Many configurations operate from settings files to allow for a non-interactive setup. We can install a web-based GUI to help with some aspects, but the Linux distributions that we will use do not come configured with a GUI. You can become proficient using the command line once you learn the basics of they operate.
We will use a terminal emulator that uses SSH (Secure Shell) to interact with our VPS.
There are two ways that you will enter commands using your terminal.
By typing: You can type the commands. You can press the tab key to auto-complete some commands.
By right-clicking: Clicking right on the terminal windows will automatically paste the contents of your clipboards into the window directly.
Sometimes, this method will save you time or prevent errors.
You should become comfortable typing in commands so that you remember them.
Install a Terminal Editor
The portable and desktop versions work the same. You can use a portable version of MobaXterm or PuTTY on a flash drive.
Connect to your VPS
Run MobaXterm after you have extracted the zip file or installed it.
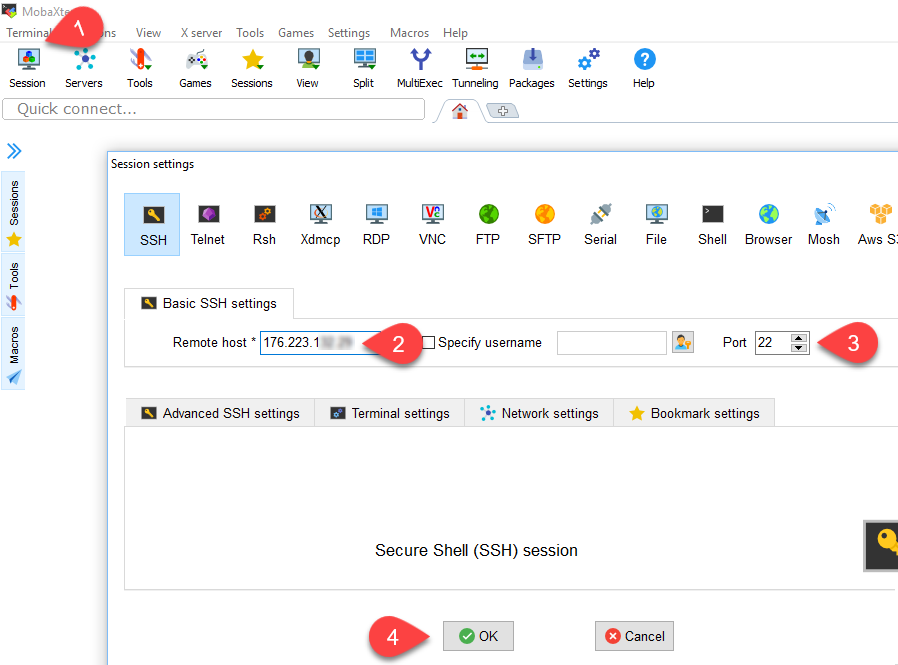
Click on the Sessions button and then on the SSH tab
Enter the configuration values
Remote host: IP address of the VPS
Port: 22 (default for the first time)

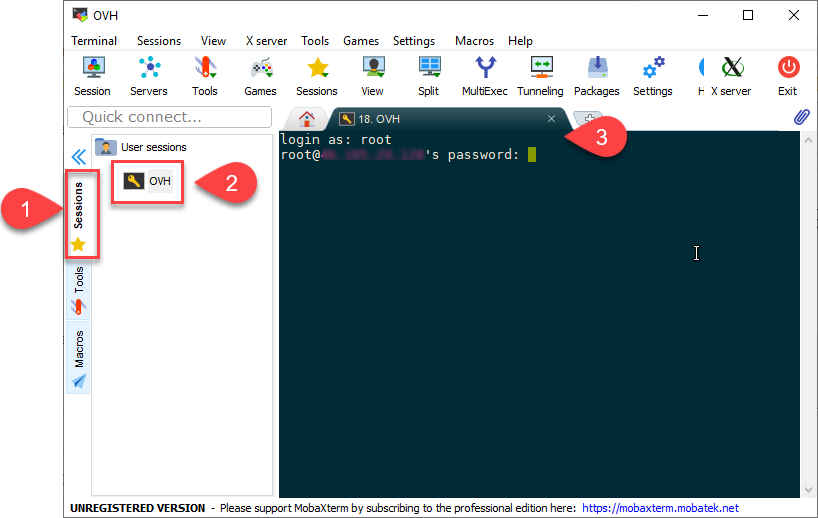
Click on the Sessions tab and then double click the name of your VPS.
login as: root
password:
check your email for the password to the VPS.
Copy it, and then click right in the terminal to paste the value.
Then, press Enter.
